
Periscope, a live-streaming platform, has become a popular way for users to share real-time experiences, engage with audiences, and build communities. While Periscope offers the ability to save broadcasts for 24 hours after streaming, there might be instances when users want to preserve these moments permanently or share them across different platforms. In this article, we’ll explore the process of grabar vídeos de Periscope.
Why Record Periscope Videos?
- Recording Periscope videos can serve various purposes, including:
- Archiving Memories: Capture and preserve special moments or valuable content shared during live broadcasts.
- Content Sharing: Share recorded Periscope videos on other platforms or with audiences who may have missed the live stream.
- Content Creation: Use recorded Periscope videos as part of a larger content creation strategy, repurposing the content for different purposes.
Method 1: iTop Screen Recorder – Your All-in-One Solution
iTop Screen Recorder is a powerful and user-friendly grabador de pantalla that allows you to capture not only your Periscope videos but also any on-screen activity. Here’s a step-by-step guide on how to use iTop Screen Recorder to record Periscope videos:
Step 1: Download and Install iTop Screen Recorder:
Visit the official iTop Screen Recorder website, download the application, and follow the installation instructions based on your operating system (Windows).
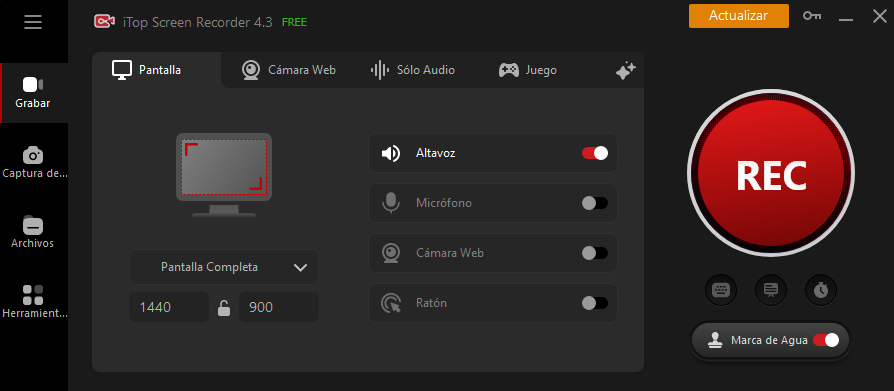
Step 2: Launch iTop Screen Recorder:
Once the installation is complete, open iTop Screen Recorder on your computer. Familiarize yourself with the intuitive interface designed for users of all experience levels.
Step 3: Configure Recording Settings:
Before starting the recording, customize the settings according to your preferences. Select the recording area to cover the Periscope video window, set the frame rate, and adjust audio settings. Ensure your microphone is properly configured if you want to include commentary.
Step 4: Open Periscope and Start the Live Video:
Launch your web browser, go to the Periscope website, and log in to your account. Start a live video or find the broadcast you want to record.
Step 5: Start Recording with iTop Screen Recorder:
Return to iTop Screen Recorder and click the “Record” button. Switch back to your browser and start playing the Periscope video. iTop Screen Recorder will seamlessly capture both the video and audio of the on-screen activity.
Step 6: Stop and Save the Recording:
Once you’ve recorded the desired Periscope video content, return to iTop Screen Recorder and click the “Stop” button. The software will automatically save the recording in your chosen format.
Step 7: Review and Edit (Optional):
Before sharing or archiving your recording, you can review the video within iTop Screen Recorder. The tool also provides basic editing features, allowing you to trim or enhance specific sections if necessary.
Step 8: Save and Share:
After reviewing and editing (if needed), save your recording in your preferred format. iTop Screen Recorder supports various file formats, ensuring compatibility for sharing across different platforms or devices.
Method 2: Alternative Screen Recording Tools
While iTop Screen Recorder provides a comprehensive and user-friendly solution, there are alternative screen recording tools that users can explore:
OBS Studio (Open Broadcaster Software): A free and open-source option with advanced features, suitable for users who require more customization.
CamStudio: A straightforward and easy-to-use screen recording tool that allows users to capture Periscope videos effortlessly.
Snagit: A versatile screen capture and recording tool with built-in editing features, suitable for users who want an all-in-one solution.
Tips for Successful Periscope Video Recording
- Check Permissions: Ensure that you have the necessary permissions to record and share Periscope videos, respecting the privacy and terms of service of the platform.
- Test Your Setup: Before recording a crucial Periscope video, conduct a test to ensure that your screen recording software is functioning correctly and capturing both video and audio.
- Consider Copyrights: Be mindful of copyright regulations when recording and sharing Periscope videos, especially if the content involves third-party copyrighted material.
- Optimize Internet Connection: A stable and fast internet connection is crucial for a seamless Periscope video recording experience. Ensure your internet connection can handle both the live stream and the recording process.
Conclusion
Recording Periscope videos with iTop Screen Recorder provides a convenient and effective way to relive, share, and repurpose your live streaming content. Whether you’re an avid Periscope user looking to preserve valuable moments or a content creator seeking to repurpose live content, iTop Screen Recorder empowers you to capture the magic of your Periscope videos effortlessly. Explore the world of screen recording and make the most of your Periscope experience by preserving and sharing your favorite live broadcasts.